Using the 8BitDo Mechanical Keyboard on macOS (Super Buttons + Karabiner)
A practical walkthrough of how I use the 8BitDo mechanical keyboard with macOS: programmable A/B keys, super-buttons, Karabiner Elements, and a small trick to replace some of the convenience of Touch ID.
Why I Picked Up the 8BitDo Keyboard
A few weeks ago, I got interested in the 8BitDo mechanical keyboard. I’m not really a “keyboard person”, I only like mechanical keyboards if the layout suits me.
After reading and watching a bunch of reviews, I decided to get one. But here’s the catch: my main machine is macOS.
Officially, 8BitDo says this keyboard only supports Windows and Android. But at the end of the day it’s still a regular keyboard, so I knew it would work fine on macOS – just without proper first-class support like official software.
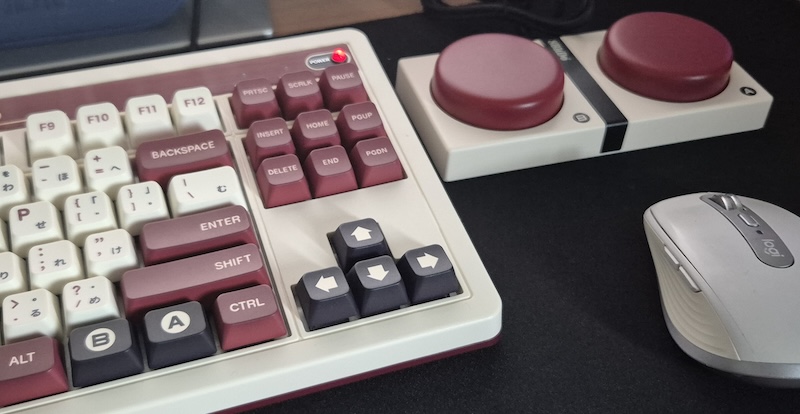
What got me excited is that the keyboard comes with two programmable keys (A and B) and two big “super-buttons” – all of which can be made useful on macOS with a bit of setup.
Programming the A & B Keys (No Software Needed)
On macOS, I normally remap the left Alt and left Win keys to act like Option and Command. That’s straightforward.
On the right side, though, there are two empty keys with “A” and “B” keycaps. These are hardware-level programmable keys – you don’t need any software to set them up.
Here’s how 8BitDo lets you map the A and B keys directly on the keyboard:
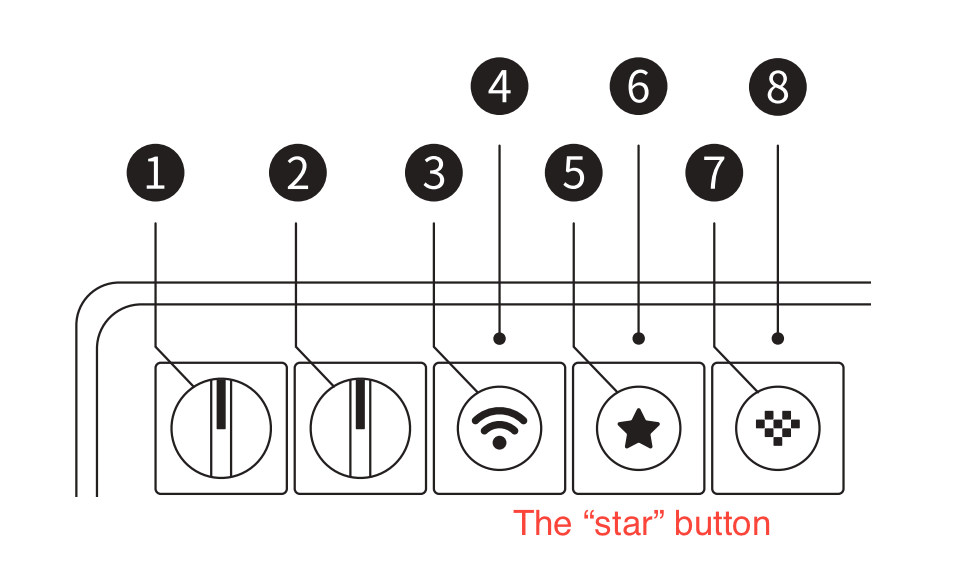
- Press the little star button on top of the keyboard.
- Press and hold the key combination you want.
- Tap either the A or B key.
For example, if I want Command + H on the A key, I do this:
- Press the star button.
- Hold
CommandandH. - Tap the A key once.
That’s it. From then on, A will trigger Command + H. Same story for B.
Getting the Super-Buttons Working on macOS
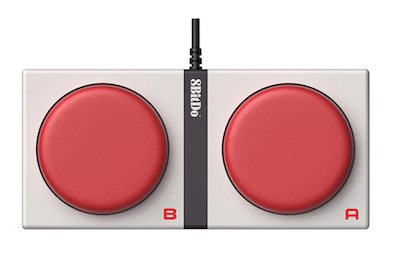
The 8BitDo keyboard also comes with two large super-buttons. Again, I’m on macOS, so at first I had no idea how to make use of them.
I spent a good three days trying to get them to register in any useful way. At one point, I almost gave up and assumed the super-buttons just wouldn’t work properly on macOS.
Then I thought: if I can program A and B using the star button, surely I can do the same for the super-buttons?
And yes – turns out you can. You program the super-buttons the same way as the A/B keys, using the star button and assigning them a key or key combo. Simple. ✨
Using Karabiner Elements for Advanced Remapping
I’m not sure if 8BitDo has official macOS software, but honestly, I don’t really need it.Karabiner Elements can remap almost every key on the keyboard, including the super-buttons.

When you install Karabiner Elements, it also comes with Karabiner EventViewer. This tool shows you exactly which keycode is being triggered when you press a key, move your mouse, or use a controller.
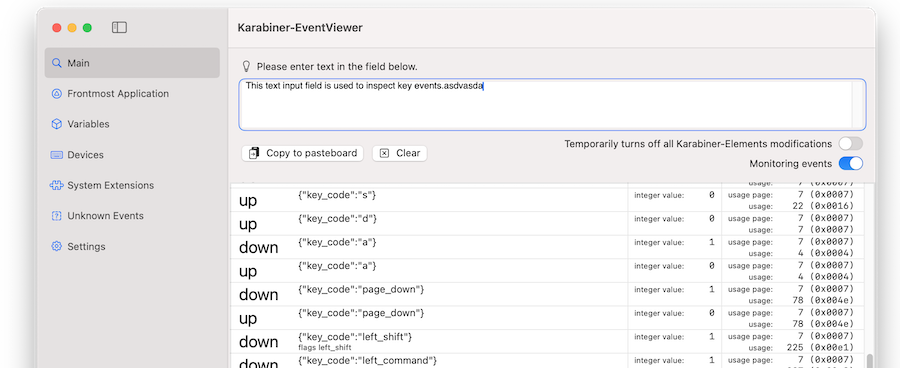
During the three days I was stuck, I tried pressing the super-buttons repeatedly while watching EventViewer. Nothing showed up – no keycodes, no events.
That’s when it clicked: I first need to assign each super-button to some existing key at the hardware level. Only then will Karabiner see it.
Choosing Base Keys for the Super-Buttons
So, which keys should act as the “base” for super-button A and B? The 8BitDo keyboard comes with some classic PC keys:Print Screen, Scroll Lock, Pause, plus keys I rarely touch like Home and End.
I don’t really use those in my normal workflow – I preferCommand + Arrow to move around when typing. So they’re great candidates for remapping.
Here’s how I assigned the Home key to Super-Button A:
- Press the star button (Fast Key Mapping) until the LED starts blinking.
- Hold the Home key.
- Press Super-Button A.
Now Super-Button A behaves like Home at the hardware level, which means Karabiner can see it and remap it to something more useful.
Inside Karabiner, I use Complex Modifications and add my own rules instead of just using the simple ones.
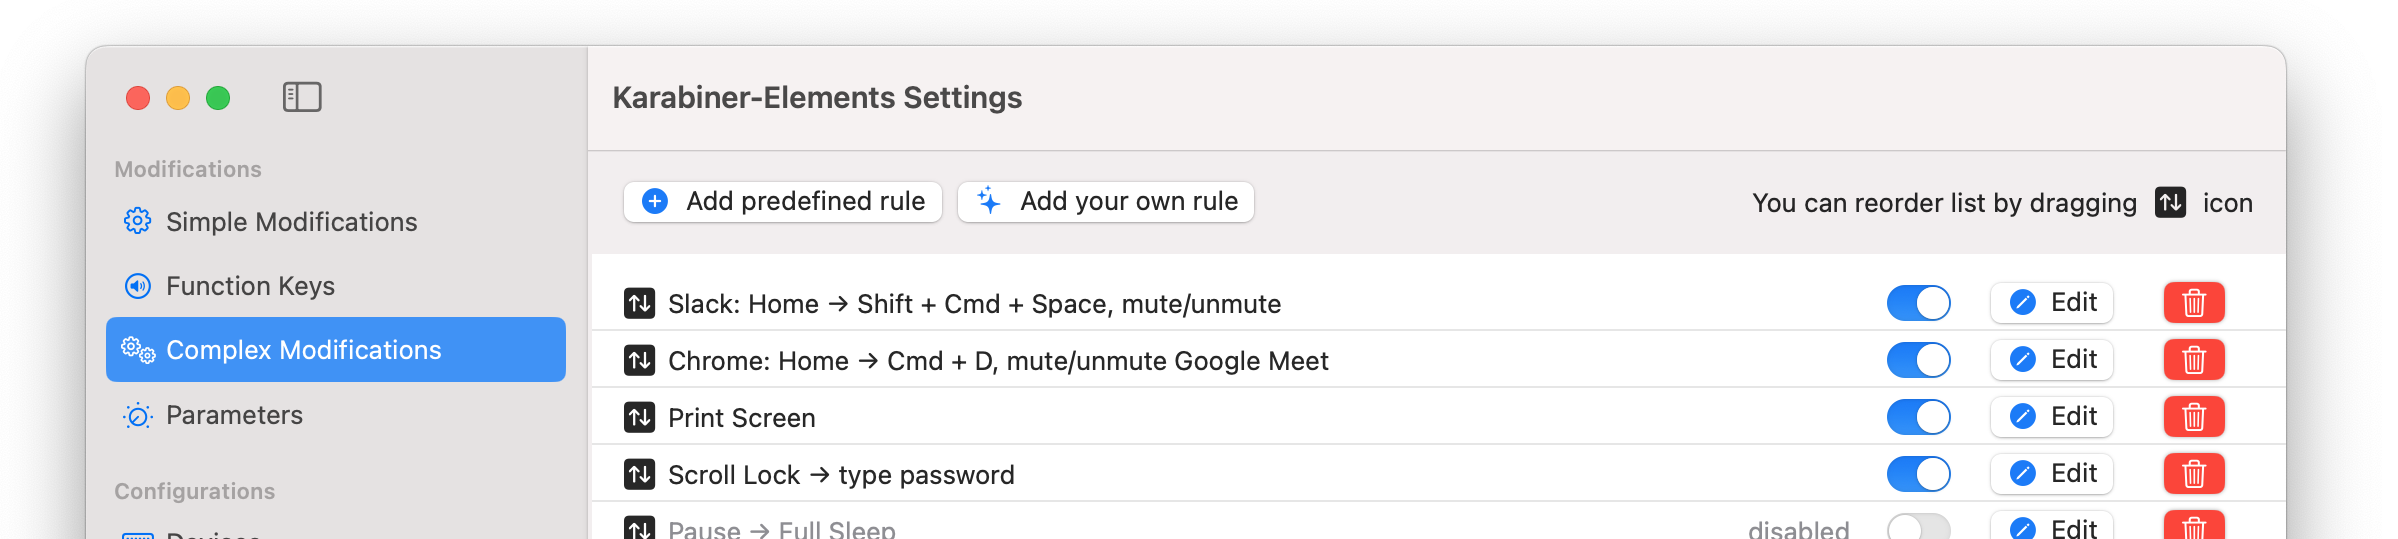
Using Super-Button A as a Mute/Unmute Button
My favourite setup is using Super-Button A as a dedicated mute/unmute button in apps like Google Meet and Slack.
For Google Chrome, I remap Super-Button A so it sendsCommand + D whenever Chrome is the active app. That lets me mute/unmute Google Meet with a single big button.
{
    "description": "Chrome: Home → Cmd + D, mute/unmute Google Meet",
    "manipulators": [
        {
            "conditions": [
                {
                    "bundle_identifiers": [
                        "^com\.google\.Chrome$"
                    ],
                    "type": "frontmost_application_if"
                }
            ],
            "from": {
                "key_code": "home",
                "modifiers": { "mandatory": [] }
            },
            "to": [
                {
                    "key_code": "d",
                    "modifiers": ["left_command"]
                }
            ],
            "type": "basic"
        }
    ]
}
Cmd + D in Chrome is “Bookmark this page”. So watch out for accidental bookmarks if you reuse that shortcut.For Slack, I use a different mapping: Super-Button A becomesShift + Command + Space when Slack is active, so I can mute/unmute huddles the same way.
{
    "description": "Slack: Home → Shift + Cmd + Space, mute/unmute",
    "manipulators": [
        {
            "conditions": [
                {
                    "bundle_identifiers": [
                        "^com\.tinyspeck\.slackmacgap$"
                    ],
                    "type": "frontmost_application_if"
                }
            ],
            "from": {
                "key_code": "home",
                "modifiers": { "mandatory": [] }
            },
            "to": [
                {
                    "key_code": "spacebar",
                    "modifiers": ["left_command", "left_shift"]
                }
            ],
            "type": "basic"
        }
    ]
}
With this setup, Super-Button A turns into a big, satisfying mute/unmute control that behaves differently depending on which app you’re in.
Replacing Some Touch ID Convenience
One downside of using any third-party keyboard on macOS is you lose Touch ID. Touch ID makes a lot of little things faster, especially when you need to confirm a password or approve permissions.
When you’re not using a Magic Keyboard with Touch ID, the system usually falls back to “Use Password”, which means you have to type your macOS password manually.
My workaround? I programmed a key to type my password and press Enter.
In my case, I mapped the physical A button so that it actually sendsScroll Lock, and then in Karabiner I turned that into a macro that types my password and hits Enter.
{
    "description": "Scroll Lock → type password",
    "manipulators": [
        {
            "from": {
                "key_code": "scroll_lock",
                "modifiers": { "optional": ["any"] }
            },
            "to": [
                { "key_code": "1" },
                { "key_code": "2" },
                { "key_code": "3" },
                { "key_code": "4" },
                { "key_code": "5" },
                { "key_code": "6" },
                { "key_code": "return_or_enter" }
            ],
            "type": "basic"
        }
    ]
}
With that in place, pressing the mapped key quickly “types” the password and submits it. Again: very convenient, but only use this if you are comfortable with the security trade-off.
Wrap-Up: Making the Most of the 8BitDo on macOS
In short, the 8BitDo mechanical keyboard works perfectly fine on macOS as long as you’re willing to spend a bit of time mapping things:
- Use the star button to program A and B keys at the hardware level.
- Treat the super-buttons the same way: map them to unused keys like Home, End, Scroll Lock, etc.
- Use Karabiner Elements and its Complex Modifications to turn those keys into app-specific shortcuts.
- Optionally, set up macros for quality-of-life shortcuts (with full awareness of the security implications).
With this combo of hardware mapping and Karabiner, the 8BitDo keyboard becomes not just compatible with macOS, but genuinely pleasant and efficient to use.
If you’ve been hesitating because the box only says “Windows / Android”, you can safely ignore that – macOS can absolutely join the party.